Introduction
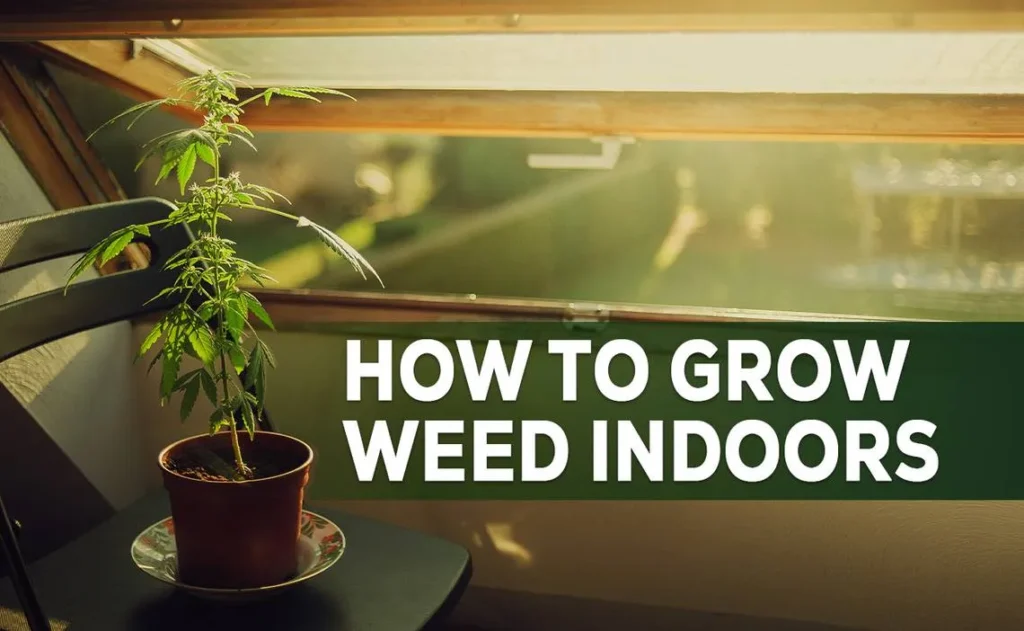
Are you curious about growing your own cannabis at home? You’re not alone! More and more people are taking up this rewarding hobby, and for good reason. Home cultivation allows you to take control of what you consume, ensuring that you’re getting high-quality, chemical-free cannabis right from your own backyard or even your living room. Plus, there’s something incredibly satisfying about nurturing a plant from seed to harvest.
So, why should you consider growing cannabis at home? First off, it can save you a ton of money. Instead of constantly buying from dispensaries, you’ll have your very own supply. This is especially great if you enjoy cannabis regularly. Secondly, homegrown cannabis can often be fresher and more flavorful than what you’d find at the store. You can experiment with different strains, growing techniques, and even tailor your growing process to suit your personal tastes.
But it’s not just about saving money and getting better quality. Growing cannabis can be a fun and therapeutic experience. Tending to your plants can be a great way to unwind after a long day. You’ll learn patience and responsibility, and you might even find a new passion. Plus, you’ll have a sense of accomplishment every time you look at those beautiful buds you grew yourself!
Now, if you’re worried about the process being too complicated, don’t be. This beginner’s guide is designed to break everything down into simple, easy-to-follow steps. We’ll cover everything from choosing the right strain and setting up your grow space to harvesting and curing your plants. By the time you finish reading, you’ll feel confident and ready to start your cannabis-growing journey.
Whether you’re looking to grow a few plants for personal use or you’re just curious about the whole process, you’re in the right place. Let’s dive in and explore the exciting world of home cannabis cultivation together!
Choosing the Right Strain
Understanding the Basics
When it comes to growing cannabis at home, one of the most important decisions you’ll make is choosing the right strain. With so many options out there, it can feel overwhelming, but don’t worry—we’ve got you covered. Understanding the different types of cannabis and what they can offer will help you pick the perfect strain for your needs.
Indica Strains
Indica strains are known for their calming and relaxing effects. If you’re looking to unwind after a long day, an Indica might be your best bet. These strains are often associated with a full-body high that can help with stress, anxiety, and even sleep issues. Think of Indica as your cozy blanket on a chilly night.
Sativa Strains
On the other hand, we have Sativa strains. These are typically more uplifting and energizing, making them great for daytime use. If you’re looking to boost your creativity or socialize with friends, a Sativa strain could be the way to go. Imagine a sunny afternoon filled with laughter and good vibes—that’s what Sativa is all about.
Hybrid Strains
Then there are Hybrid strains, which are a blend of both Indica and Sativa. These strains can offer a mix of effects, depending on their genetic makeup. Some hybrids are more Indica-dominant, providing a relaxing experience, while others lean towards Sativa, giving you that energizing boost. Hybrids are great if you want a balanced experience tailored to your specific needs.
Considering Your Environment
Once you have an idea of which type you’re leaning toward, it’s time to think about your personal preferences and the environment you’ll be growing in. Some strains thrive better in certain climates, so it’s worth doing a little research. For instance, if you live in a warmer area, you might want to look for strains that are more heat-tolerant.
Seeds vs. Clones
Now, you also need to decide whether you want to start from seeds or clones. Seeds are a more traditional method and allow you to choose from a wider variety of strains. Clones, on the other hand, are cuttings from a mature plant and can give you a head start since they’re already established. Each method has its pros and cons, so think about what works best for you.
Setting Up Your Grow Space
Indoor vs. Outdoor Growing
One of the first big decisions you’ll face when growing cannabis at home is whether to go for indoor or outdoor cultivation. Each option has its own set of advantages and challenges, so let’s break it down.
If you choose indoor growing, you’ll have more control over the environment. You can regulate the temperature, humidity, and light exposure, which is crucial for healthy plant growth. This method also keeps your plants out of sight, offering more privacy. However, indoor growing requires an upfront investment in equipment like grow lights and ventilation systems.
On the flip side, outdoor growing can be a simpler and cheaper option. If you have a suitable space with plenty of sunlight, your plants can thrive naturally. Outdoor plants tend to grow larger and yield more compared to their indoor counterparts. Just keep in mind that you’ll need to consider factors like weather, pests, and local laws regarding outdoor cultivation.
Essential Equipment for Indoor Growing
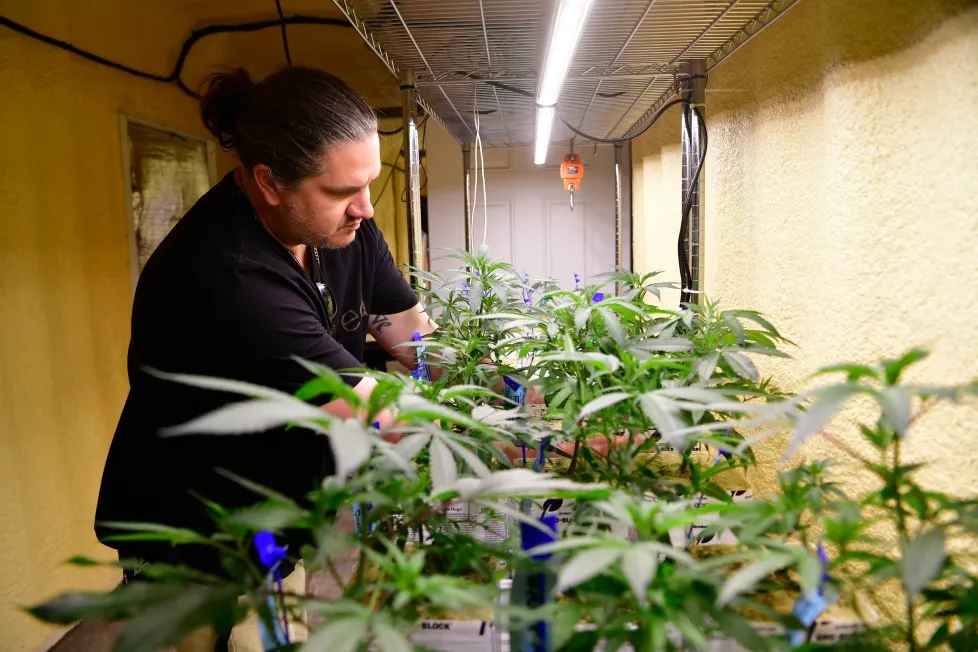
If you decide to go the indoor route, you’ll need some essential equipment to create the perfect grow environment. Proper lighting is key for healthy plant growth. LED grow lights are a popular choice because they’re energy-efficient and provide the spectrum of light that cannabis plants need. There are also HID lights and fluorescent options, so do some research to find what suits your setup best.
Good airflow is crucial to prevent mold and ensure healthy plants. You’ll want to invest in fans and possibly an exhaust system to keep fresh air circulating and maintain the right temperature and humidity levels.
A grow tent can help create a controlled environment, while pots should have good drainage to prevent overwatering. Make sure to choose the right size for your plants to allow for proper growth.
Soil and Nutrients
Soil quality and nutrients play a major role in the success of your cannabis plants. You’ll want to start with high-quality potting soil that provides good drainage and aeration. There are also specific soil mixes designed for cannabis that can give your plants a great start.
As your plants grow, they’ll need nutrients to thrive. There are organic options like compost and worm castings, or you can go with synthetic nutrients that are specifically formulated for cannabis. Just be mindful of the feeding schedule, as overfeeding can harm your plants.
Germination and Planting
Germinating Cannabis Seeds
Germination is the first step in bringing your cannabis plants to life. If you’re new to growing, don’t worry—germinating seeds is a simple process. There are a few methods you can use, but one of the easiest and most effective ways is the paper towel method.
Start by placing your cannabis seeds between two moist paper towels. Make sure they’re damp but not soaking wet. Place the paper towels with the seeds inside a plastic container or between two plates to keep moisture in.
Store them in a warm, dark place, like a cupboard or closet, for a few days. Check them regularly to make sure the paper towels don’t dry out. After a day or two, you should see tiny white roots, known as taproots, start to emerge from the seeds. Once the taproots are about a quarter-inch long, your seeds are ready to be planted.
Another popular germination method is to plant the seeds directly into the soil. This can work well if you’re growing outdoors or want to avoid the risk of damaging the taproot when transferring the sprouted seeds. Simply plant the seed about a half-inch deep in moist soil, cover it lightly, and wait for it to sprout.
Transferring Germinated Seeds to Soil
Once your seeds have germinated, it’s time to move them to their growing medium—usually soil or a potting mix. Handle the seeds with care, making sure not to touch the delicate taproot. Use tweezers to gently place the seed taproot-side down into a small hole you’ve made in the soil. Cover the seed lightly, and then water the soil so it’s moist but not too wet. You want to make sure the growing environment stays humid to help your plant start strong, so some people even cover their pots with plastic to lock in moisture.
Position your pots or containers where they can get plenty of sunlight if growing outdoors, or under your grow lights if indoors. At this stage, your plant doesn’t need intense lighting, but make sure it’s getting around 18 hours of light per day for optimal growth.
The First Stages of Growth
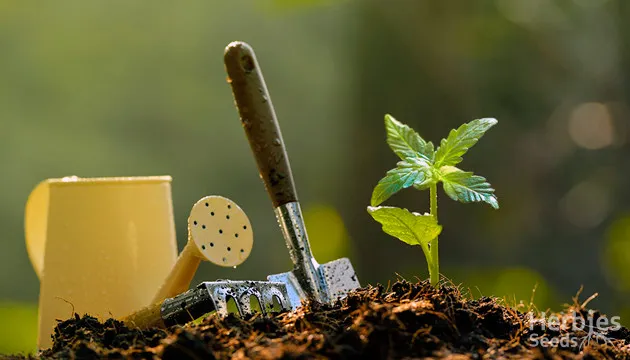
Once your seed is planted and begins to sprout, you’ll enter the seedling stage. This is when the first few leaves, known as cotyledons, appear. These tiny leaves will help your seedling gather energy from the light. Afterward, you’ll see the characteristic serrated leaves of the cannabis plant start to develop.
At this early stage, it’s important to keep the soil moist, but don’t overwater. Seedlings are fragile and can be easily damaged by too much water. Make sure your grow space is well-ventilated to prevent mold or other issues that could harm your baby plants. During this stage, your plants are building their roots, so a balanced amount of water and light will give them the best start.
Caring for Your Cannabis Plants
Watering Your Plants
Watering your cannabis plants is one of the most crucial aspects of ensuring they grow healthy and strong. It might sound simple, but there’s a bit of an art to getting it just right. Cannabis plants don’t like to be overwatered, but they also don’t want to dry out. Striking the right balance is key.
Start by making sure you’re using pots or containers with good drainage. This will help prevent water from pooling at the bottom and drowning the roots. When you water, make sure the soil is moist but not soaking. A good rule of thumb is to water the plants when the top inch or two of soil feels dry to the touch. If you’re growing indoors, the frequency of watering might depend on the heat from your grow lights and overall room temperature.
Also, keep in mind that your plants’ watering needs will change as they grow. Young plants or seedlings need less water compared to mature ones. As your plants develop and their roots grow deeper, you’ll need to water them more thoroughly.
Providing Nutrients
Cannabis plants need a variety of nutrients to thrive. During the different stages of growth, they require varying levels of key nutrients like nitrogen, phosphorus, and potassium. These nutrients are typically available in both organic and synthetic forms, so you can choose what’s best for your setup.
During the vegetative stage, cannabis plants require more nitrogen to fuel their growth. This is when your plants are developing leaves and stems, so providing the right nutrients is crucial to ensure they get strong and healthy. Nitrogen-rich fertilizers or nutrient mixes designed for cannabis are ideal at this stage.
As your plants move into the flowering stage, they need less nitrogen and more phosphorus and potassium. These nutrients help the plant produce big, healthy buds. Make sure to switch to a nutrient mix formulated for flowering plants, or adjust your feeding schedule accordingly.
Always be cautious not to overfeed your plants, as this can lead to nutrient burn, which causes leaf tips to turn brown and can stunt growth. Follow the recommended guidelines for any nutrients or fertilizers you’re using and monitor how your plants respond.
Pruning and Training
To get the most out of your cannabis plants, you might want to consider pruning and training them. Pruning involves removing any dead or excess leaves that aren’t receiving enough light. By trimming these leaves, you’re helping the plant focus its energy on the areas that can grow the most efficiently, like the buds. It also helps improve airflow, which can reduce the risk of mold and pests.
Training your plants is another way to maximize yield. One popular technique is called low-stress training (LST). This involves gently bending and tying down the branches so more light can reach different parts of the plant. This can lead to bigger buds and a more even canopy of growth. Another method is topping, where you cut off the main stem, encouraging the plant to grow multiple main colas, which can result in a higher yield.
Controlling Pests and Diseases
Just like any other plant, cannabis is susceptible to pests and diseases. Common problems include spider mites, aphids, and powdery mildew. Keeping an eye on your plants and checking them regularly for any signs of trouble is essential.
For indoor grows, maintaining a clean environment is crucial to prevent pests. Outdoor growers should be extra cautious, as insects and critters can be more of a problem. One way to ward off pests naturally is by introducing beneficial insects like ladybugs, which can eat harmful pests without harming your plants. You can also use organic pest sprays or neem oil to help control infestations.
If you notice white powder on your leaves, it could be powdery mildew, a common fungal disease. To prevent this, ensure your grow space has good airflow and that humidity levels are kept in check. If the problem persists, you can use organic fungicides or a diluted mixture of water and baking soda as a natural remedy.
Pest and Disease Management
Common Cannabis Pests
When growing cannabis at home, one of the most frustrating challenges you may face is dealing with pests. A variety of bugs can invade your grow space, and if left unchecked, they can damage or even destroy your plants. Some of the most common pests you’ll likely encounter include spider mites, aphids, and fungus gnats.
Spider mites are tiny, almost invisible insects that feed on the sap of cannabis plants. They can cause yellowing leaves and weaken your plant’s overall health. If you notice fine webbing on your plants, you’re likely dealing with spider mites.
Aphids are small, pear-shaped bugs that cluster on the underside of leaves and suck the sap out of your plants. They can cause curling leaves and stunted growth if not dealt with quickly.
Fungus gnats are tiny flying insects whose larvae live in the soil and feed on plant roots. They are especially problematic in overly moist soil and can hinder plant growth if not controlled.
Recognizing Signs of Pest Infestations
To keep your cannabis plants healthy, it’s essential to recognize the early signs of pest infestations. Regularly inspecting your plants is the best way to catch these issues before they spiral out of control. Look for things like discolored or curling leaves, tiny bite marks, sticky residue, or the presence of small bugs on the stems and leaves.
Spider mites often leave behind small yellow or white speckles on the leaves, and aphids can cause leaves to become distorted. Fungus gnats are usually spotted flying around the soil or plants, and their larvae can lead to drooping leaves or poor growth.
Being vigilant about these early warning signs will help you take action quickly, preventing more severe damage.
Preventing Pest Infestations
The best way to handle pests is to prevent them from becoming a problem in the first place. A clean growing environment is key. For indoor grows, make sure your grow space is tidy, and clean up any dead plant matter or debris that could attract pests. Good ventilation is also important, as stagnant air can encourage pests to settle in.
For outdoor growers, try companion planting, where you plant certain herbs or flowers near your cannabis plants to repel pests. Marigolds, for example, are known to deter aphids and other insects. Also, rotating crops each season can prevent pests from becoming too comfortable in your grow space.
Maintaining proper watering practices is another way to avoid attracting pests like fungus gnats. Watering too frequently can keep the soil moist, creating a perfect breeding ground for larvae. Let the soil dry out between waterings to discourage pests from taking up residence.
Natural Pest Control Methods
If you do find pests on your plants, don’t panic—there are natural pest control methods that can help. Neem oil is a popular organic pesticide that’s safe for cannabis plants. It can be sprayed on leaves to keep pests like spider mites and aphids at bay. Just make sure to apply it during the early morning or evening to avoid burning your plants under intense light.
Beneficial insects can also be a great ally in pest control. Introducing ladybugs or predatory mites to your grow space can help keep harmful insects under control, as they feed on pests without damaging your plants.
Diatomaceous earth, a natural powder made from fossilized algae, can be sprinkled around the base of your plants to deter crawling pests. It’s harmless to your plants but lethal to soft-bodied insects like aphids and fungus gnat larvae.
Common Cannabis Diseases
While pests can be a headache, cannabis plants are also susceptible to various diseases, often caused by fungi, bacteria, or viruses. One common issue is powdery mildew, which shows up as a white, powdery substance on the leaves and can stunt plant growth. Root rot is another problem, typically caused by overwatering, which leads to decaying roots and poor plant health.
Other diseases include bud rot, where mold attacks the buds of your plants, and nutrient deficiencies, which can cause discolored or misshapen leaves. Keeping an eye on your plants for any unusual symptoms is key to catching these diseases early.
Treating and Preventing Diseases
To treat fungal diseases like powdery mildew, fungicidal sprays are an option. Many growers also use a mixture of baking soda and water as a natural solution to kill the fungus. Ensuring proper airflow around your plants can help prevent mildew from spreading.
Root rot is usually a result of poor drainage or overwatering, so the best prevention method is to let the soil dry out between waterings. Using a well-draining soil mix and pots with plenty of drainage holes will help avoid this issue.
For nutrient-related diseases, it’s essential to provide your plants with the right balance of nutrients. Follow the feeding schedule carefully and adjust based on your plant’s growth stage.
Harvesting and Curing
When to Harvest Cannabis
The moment you’ve been waiting for as a grower is finally here—harvesting your cannabis! But knowing exactly when to harvest is crucial. Harvest too early, and the potency of your buds may not reach its full potential. Harvest too late, and the THC might begin to degrade, reducing the quality of your product.
To determine the best time to harvest, you’ll want to closely observe your plants, paying particular attention to the trichomes and pistils. Trichomes are tiny, mushroom-shaped glands on your buds and leaves that produce cannabinoids like THC and CBD. Under a magnifying glass or microscope, you can see if they’re clear, cloudy, or amber in color. The general rule of thumb is to harvest when most of the trichomes have turned cloudy, as this indicates peak potency. If you wait until the trichomes are mostly amber, you’ll get more of a sedative, couch-lock effect.
The pistils—small hair-like structures on the buds—are another indicator. When about 70-90% of the pistils have darkened from white to brown or orange, it’s usually a sign that your plant is ready for harvest. By monitoring these visual cues, you can decide the perfect time to cut down your plants.
How to Harvest Your Cannabis Plants
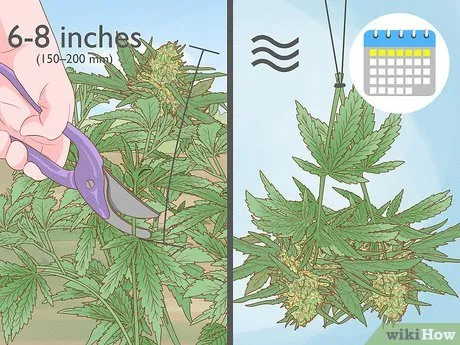
Harvesting is fairly straightforward, but there’s a method to it that can help preserve the quality of your buds. First, ensure you have sharp, sanitized scissors or pruning shears. You’ll want to avoid any contaminants as your buds are now in their final stage.
To begin, cut down each branch or entire plant depending on your space and drying method. For small spaces, it’s often easier to cut individual branches, while for larger grows, some prefer to hang the whole plant upside down to dry. Be careful not to handle the buds too much, as the trichomes are delicate and can easily fall off if mishandled.
Once you’ve harvested, it’s time to trim your buds. There are two types of trimming: wet trimming and dry trimming. Wet trimming involves removing the large fan leaves and sugar leaves immediately after harvesting. Dry trimming means you’ll leave the leaves on during the drying process and remove them afterward. Wet trimming speeds up the drying time but can be a bit messier, while dry trimming takes longer but is less sticky.
Drying Cannabis Properly
Drying is a critical step in preserving the potency, flavor, and smoothness of your cannabis. After you’ve harvested your plants, they need to be dried slowly in a controlled environment. The ideal drying environment is a dark space with a temperature between 60-70°F (15-21°C) and humidity levels of around 45-55%.
Hang your branches or buds upside down in a well-ventilated space, allowing for air circulation to prevent mold.
You’ll want to avoid direct sunlight and excessive heat, which can degrade cannabinoids and terpenes. Typically, drying takes anywhere from 7 to 14 days, depending on the size of the buds and the environmental conditions.
You’ll know the buds are dry when the small stems snap rather than bend. At this point, the outer layer of the buds should feel dry to the touch, but they should still retain some moisture inside.
The Importance of Curing
Curing is often overlooked by beginners, but it’s a vital step in producing high-quality cannabis. Properly cured buds are smoother to smoke, have a richer flavor, and preserve potency over a longer period.
Once your buds are dry, you can begin the curing process by placing them in airtight containers—glass mason jars work best. Fill the jars about 75% full, leaving some space for airflow. Store the jars in a cool, dark place.
For the first week or two, you’ll need to “burp” the jars once or twice a day. This means opening the jars for a few minutes to release any built-up moisture and allow fresh air in. After the first couple of weeks, you can reduce burping to once every few days.
Curing can take anywhere from 2 weeks to several months, with most growers curing their buds for at least 4 weeks for the best results. The longer the cure, the better the flavor and smoothness, so patience is key!
Storing Your Cannabis
After curing, you’ll want to store your cannabis properly to preserve its potency and flavor. Keep your buds in airtight containers, stored in a cool, dark place away from direct sunlight and heat. Avoid plastic bags, as they can cause your buds to sweat and lose moisture, which can lead to mold. Properly stored cannabis can maintain its quality for up to a year or more.
If you’re looking to preserve terpenes and cannabinoids even longer, you might consider vacuum sealing your buds or using specialized storage containers designed for long-term preservation.
Legal Considerations
Understanding Cannabis Laws in Your Region
Before you even think about growing cannabis at home, it’s essential to know the legal status in your area. Cannabis laws vary significantly depending on where you live, so doing your research ahead of time can save you a lot of trouble down the line. In some regions, growing cannabis for personal use is perfectly legal, while in others, it might be heavily restricted or entirely prohibited.
For example, in many parts of the United States, states have legalized cannabis for medical or recreational use, but each state has its own rules regarding how many plants you can grow and what conditions need to be met. Even within legalized states, cities and counties can have their own regulations, so make sure to check local laws as well. Some countries have decriminalized cannabis, meaning you might not face jail time, but growing it could
still result in fines or confiscation.
It’s also important to understand that federal and local laws don’t always align. In places where cannabis is legal at the state level but illegal federally, there’s a gray area that can sometimes lead to complications, especially if you’re caught transporting plants or products across state lines.
Licensing and Permits
In some areas, you may need a license or permit to grow cannabis at home legally. For medical cannabis, many places require you to obtain a prescription from a healthcare provider and register as a patient with the state. In these cases, the number of plants you’re allowed to grow is often limited to what’s deemed a reasonable amount for personal medicinal use.
If growing for recreational use, some regions allow a small number of plants without the need for a license, while others may require you to apply for one, especially if you’re growing more than a few plants. It’s also worth noting that there are often age restrictions, with most laws only permitting adults over the age of 18 or 21 to cultivate cannabis legally.
Failing to follow the proper licensing procedures can lead to legal consequences, including fines or having your plants confiscated, so it’s essential to know what’s required in your area.
Plant Limits and Restrictions
Even if growing cannabis is legal in your area, there are usually restrictions on how many plants you can grow at once. These limits are often put in place to ensure that the cultivation remains for personal use and doesn’t cross into commercial territory.
For example, some states in the U.S. allow up to six plants per person, with a maximum of twelve plants per household, regardless of how many people live there. In other places, the limit may be as low as four plants or as high as fifteen. Additionally, many places have rules about how many of those plants can be flowering versus how many must be in the vegetative stage.
Violating plant limits, even accidentally, can result in penalties, so always keep track of how many plants you have and where they are in their growth cycle.
Where You Can Grow Cannabis
Many places that allow home cultivation have specific rules about where you can grow cannabis. For example, most laws require that your plants be grown in a private, enclosed space like a backyard, greenhouse, or indoor grow room. This ensures that the plants are not visible from the street or neighboring properties, protecting both privacy and public safety.
Some laws also dictate that outdoor plants must be grown within a fenced or locked area to prevent unauthorized access, particularly by minors. If you live in a rental property, you’ll need to check your lease or ask your landlord for permission, as many landlords don’t allow cannabis cultivation on their property, even in places where it’s legal.
If you have roommates or live in a multi-unit building, growing indoors might be subject to additional restrictions, such as fire safety regulations or concerns about electrical use from grow lights and ventilation systems.
Selling or Sharing Cannabis
While growing cannabis at home may be legal in your area, that doesn’t necessarily mean you can sell or distribute what you grow. In most cases, selling cannabis without the proper licenses is illegal and could result in serious legal consequences. Even sharing cannabis with friends or family might be regulated, especially if it crosses state or national borders.
For personal use growers, it’s typically legal to consume what you grow and, in some cases, to give small amounts away to other adults. However, gifting cannabis in large quantities or to minors is generally prohibited, even in areas where personal cultivation is legal.
It’s also important to note that transporting cannabis—even your own homegrown stash—across state or national borders can result in legal trouble. This is especially true if you’re traveling through areas where cannabis is still illegal, so be mindful when moving plants or products across regions.
Conclusion
Growing cannabis at home can be an incredibly rewarding and enjoyable experience, especially when you see the fruits of your labor come to life. Whether you’re growing for personal use or medical reasons, taking the time to learn the ins and outs of cannabis cultivation—from choosing the right strain, setting up your grow space, and managing pests, to mastering the art of harvesting and curing—will give you the best chance of success. It’s not just about having a green thumb; it’s about understanding your plants and providing them with the environment they need to thrive.
As you navigate through the process, remember to stay within the legal guidelines of your area to avoid any unwanted issues. Starting small and gaining experience will help you learn the ropes, and with patience and attention to detail, you can cultivate high-quality cannabis that meets your personal needs. Whether you’re aiming for a simple indoor grow or experimenting with outdoor setups, growing cannabis is a journey that offers both challenges and rewards. With the right knowledge and care, you can enjoy your very own homegrown cannabis, customized just the way you like it.

